Add pickup points to WooCommerce checkout
This guide adds a pickup point and parcel locker selector to a WooCommerce checkout with the free PickupSelect for WooCommerce plugin. Customers choose a shipping method such as "GLS parcel locker", then a point of that carrier on a map. It takes about ten minutes and needs no code. For an overview and the list of carriers, see the WooCommerce plugin page.
You need: WordPress 6.5 or newer, WooCommerce 8.6 or newer, PHP 8.1 or newer and a PickupSelect account. You can create the account while connecting the shop, and a new shop starts on the free plan.
If your shop is not on WooCommerce, see Install the Widget. To see the map first, open the Playground.
1. Install the plugin
In WordPress, go to Plugins › Add New Plugin, search for PickupSelect, then install and activate it. WooCommerce must be active.
2. Connect the shop
Go to WooCommerce › Settings › Shipping › PickupSelect and click Connect to PickupSelect. Log in or sign up on pickupselect.com, approve the shop, and you return to WordPress connected. There are no keys to copy, and the shop's address is allowed automatically.
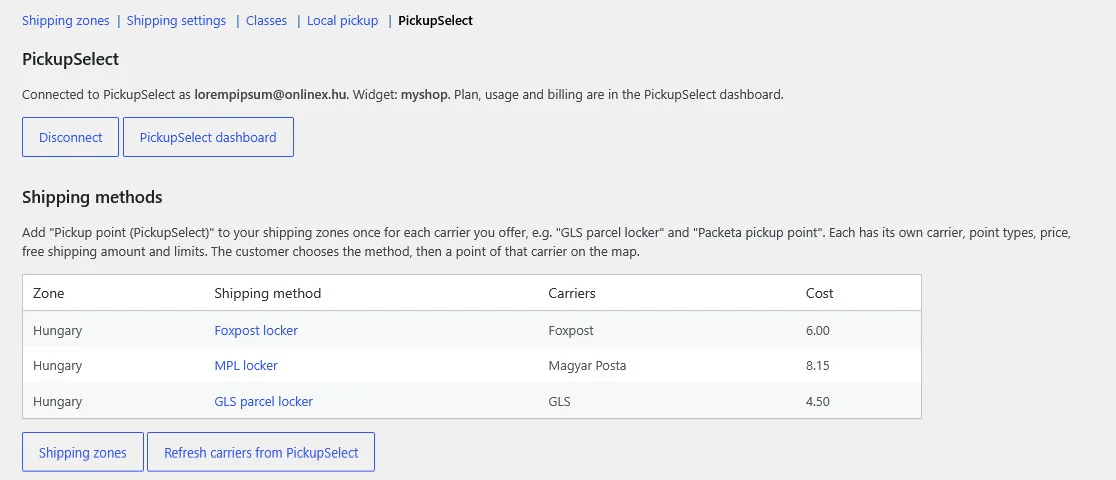
The same page sets the map's theme, colours and language under Appearance, and whether the chosen point becomes the order's shipping address. If you prefer, "Enter keys manually instead" accepts a widget key and an API key from the PickupSelect dashboard.
3. Add a shipping method for each carrier
Go to WooCommerce › Settings › Shipping › Shipping zones and open the zone where you offer pickup points. Choose Add shipping method › Pickup point (PickupSelect), then fill in:
- Name: what the customer sees in the checkout, for example "GLS parcel locker".
- Carrier: usually one, for example GLS. Leave it empty for all carriers.
- Point types: for example only lockers. Leave it empty for all the carrier's point types.
- Cost: the price of this method.
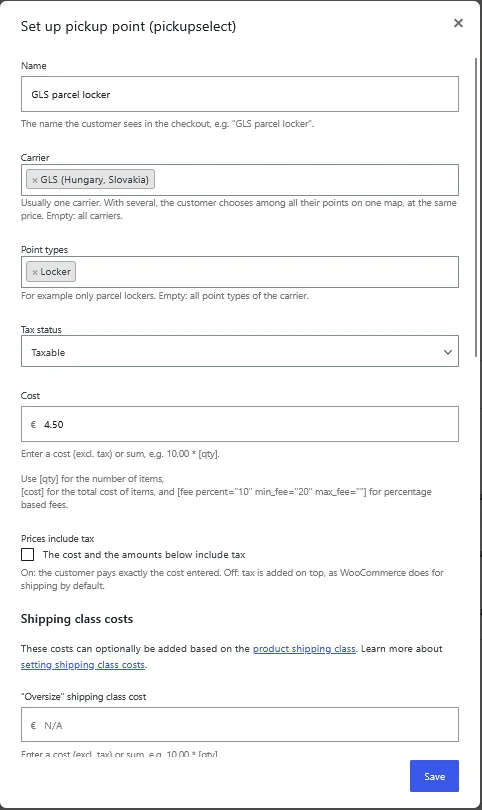
Repeat this for every carrier you offer, for example a second method named "Packeta pickup point" with its own price.
Several carriers on one map: select more than one carrier in a method. The customer then picks the nearest point of any of them, at one price.
4. Set prices and limits
The method is built on the WooCommerce flat rate, so the Cost field accepts its formulas:
3.90: a fixed price.2.90 + 0.50 * [qty]: a base price plus an amount per item.[fee percent="10" min_fee="3"]: 10% of the order value, at least 3.
A different price in each country: create a shipping zone per country and add the method to each zone with its own cost. The map only offers the carrier's points in the countries of that zone.
Tax: set Tax status for the method. With Prices include tax on, the customer pays exactly the cost you entered. With it off, tax is added on top.
Further down in the same window, Free shipping and limits has these optional fields for each method:
- Free above: the shipping is free from this order value.
- Minimum order and Maximum order: the method is not offered outside this range. Order value means the products after discounts.
- Maximum weight: not offered above this cart weight, so your products need a weight set.
- Not for shipping classes: hide the method when the cart contains these products, for example a "Bulky" class that does not fit in a locker.
5. Test the checkout
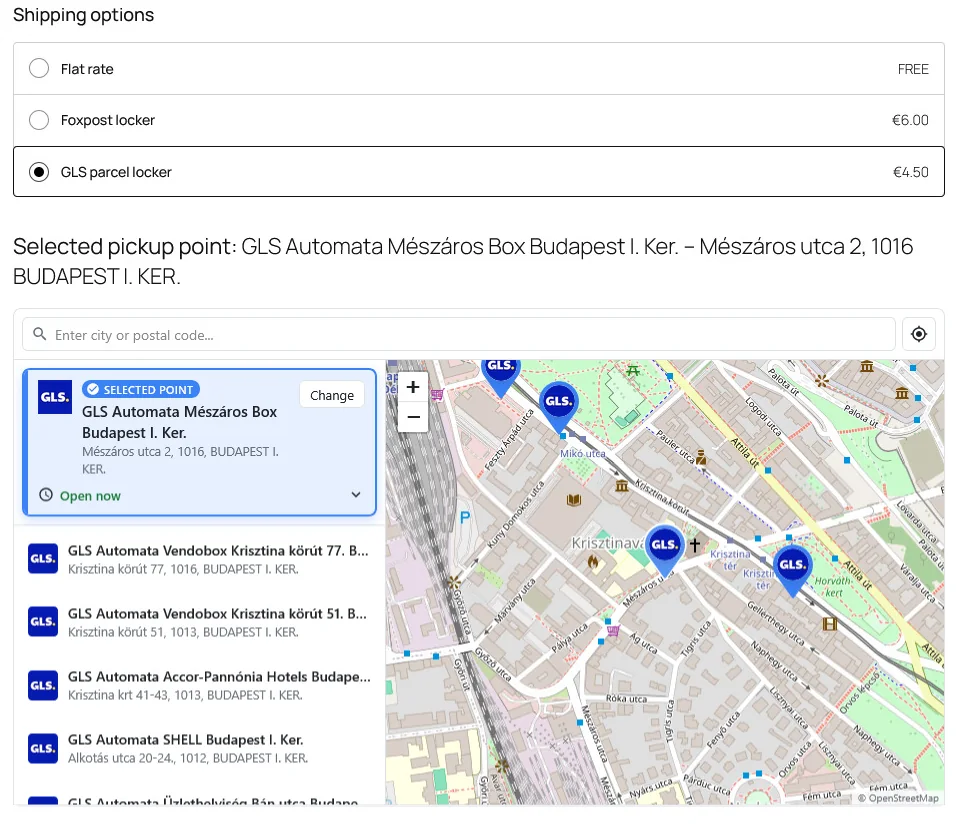
Add a product to the cart and open the checkout with an address in the zone. Choose the method, and the map opens for that carrier. An order cannot be placed with this method until a point is selected. It works in both the block checkout and the classic shortcode checkout.
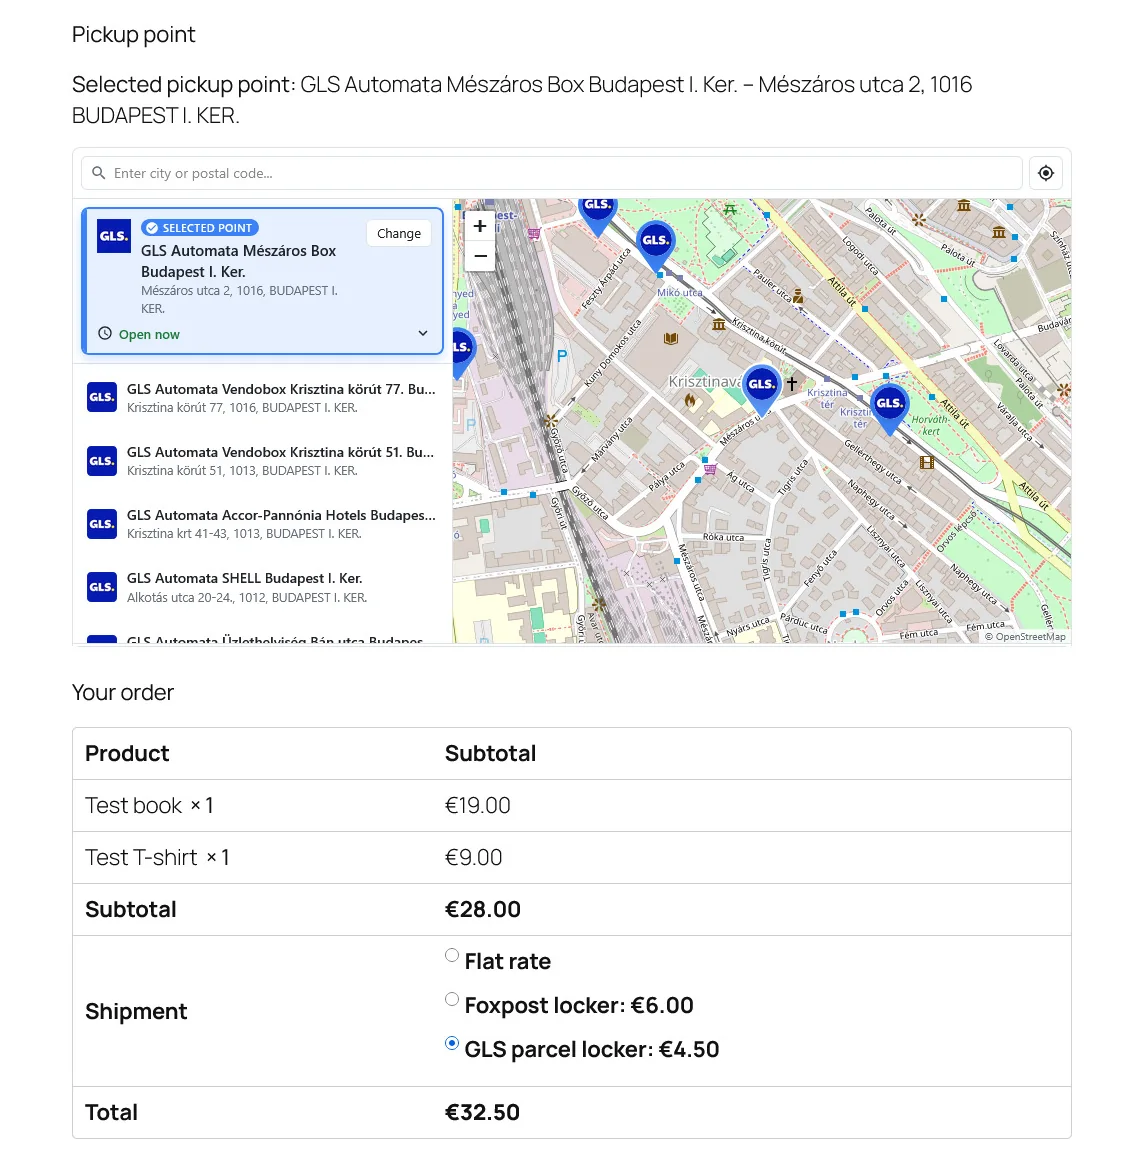
In the classic checkout, the map appears above the order summary:
Cash on delivery for some carriers only
Go to WooCommerce › Settings › Payments › Cash on delivery. Enable for shipping methods lists each pickup point method separately, so you can allow it for one carrier and not for another.
Orders
The chosen point (ID, name, address, carrier) is saved with the order and shown in the admin, on the order confirmation and in the order emails. The plugin does not create shipping labels, but the point's carrier ID is on the order for your carrier's label tool.
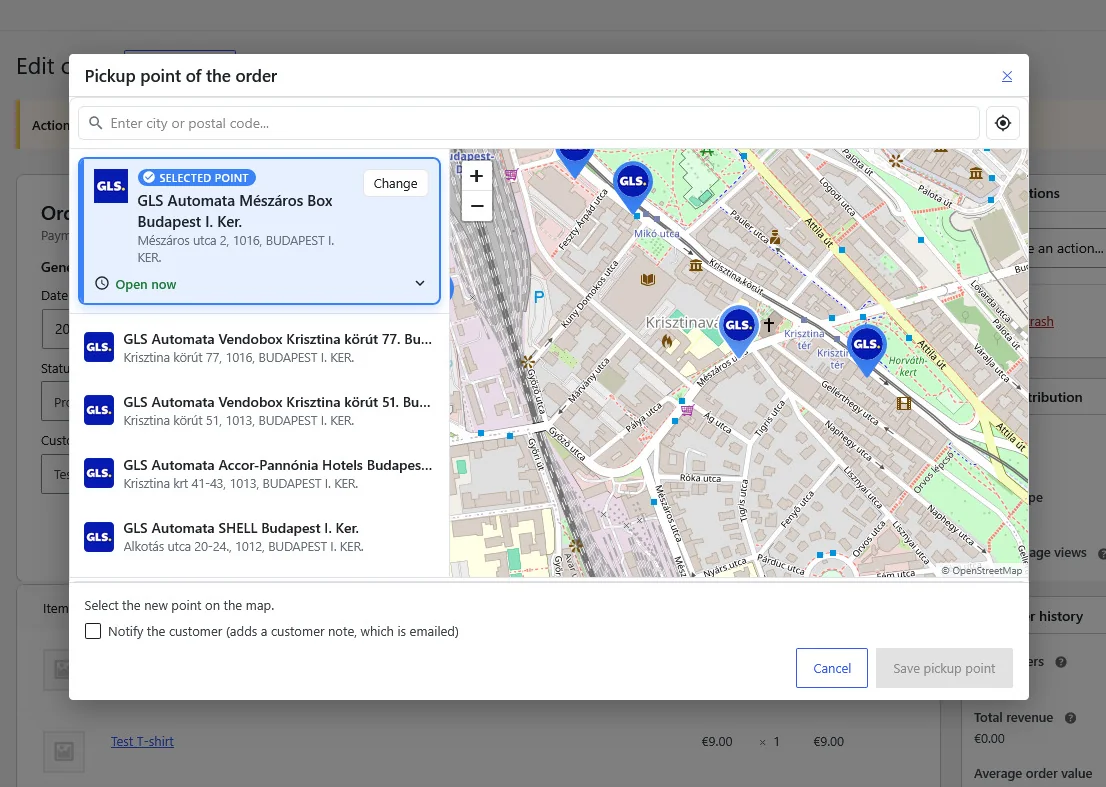
To change the point of an order, open it in the admin and use Change pickup point. The map shows the carriers of the order's shipping method, and you can notify the customer. The shipping cost of the order does not change.
Troubleshooting
The pickup point option does not appear in the checkout. Check these in order:
- The customer's address belongs to the shipping zone that has the method.
- The carrier has points in the countries of that zone.
- The cart is within the method's order value and weight limits, and contains no product of a hidden shipping class.
- The WordPress dashboard and WooCommerce pages show a warning if the service is the cause: the plan's daily limit is used up, there is no active plan, the keys are not valid, or PickupSelect cannot be reached.
The daily limit: PickupSelect emails you when the day's usage reaches 80% of the limit. If it is used up, the option is hidden until the limit resets at 00:00 UTC, and customers can still order with your other methods.
A cost such as 2.30 is rounded to 2 when saved. WooCommerce formats the field by the shop's currency settings. Set WooCommerce › Settings › General › Number of decimals to 2, then enter the cost again. This often happens after switching a shop from a currency without decimals.
A carrier is missing from the Carrier field. Click Refresh carriers from PickupSelect on the PickupSelect settings page. The supported carriers are on the WooCommerce plugin page.